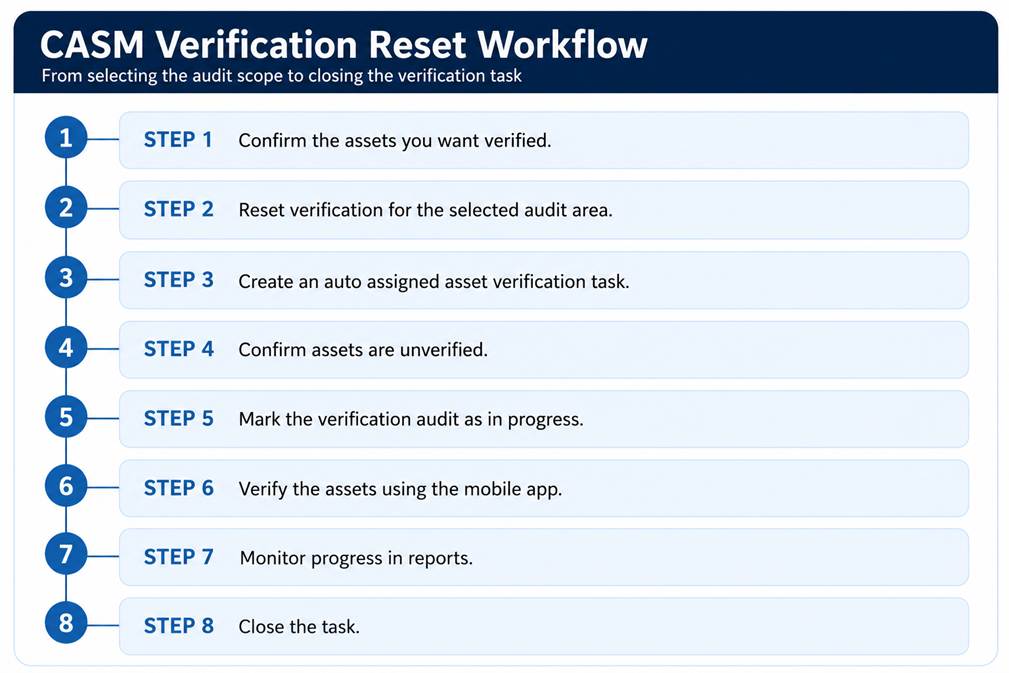
CASM Verification Reset is used to begin an asset audit for a selected area. The process removes the existing verification stamp from the selected assets and places them into an unverified state. Each asset must then be physically located and verified through the CASM mobile app.
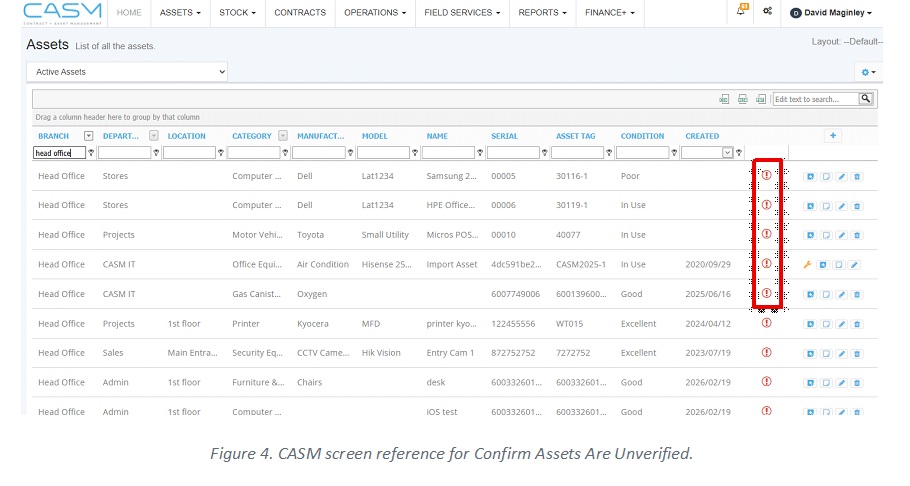
Assets that have not yet been verified are clearly marked. This makes it easier to identify outstanding assets and focus investigation on items that cannot be found or confirmed.
This guide uses the CASM Admin profile. The Admin profile has full access to the asset, verification reset, task and reporting features used in the process.
Important: Users with restricted permissions may not see all the menus or actions shown in this guide.
| Indicator | Meaning |
| Green tick | The asset has been verified. |
| Red exclamation mark | The asset is unverified and must be found and verified. |
Go to My Assets. Filter the list to the branch, department or area that will be audited. Confirm the current assets display a green verification tick.
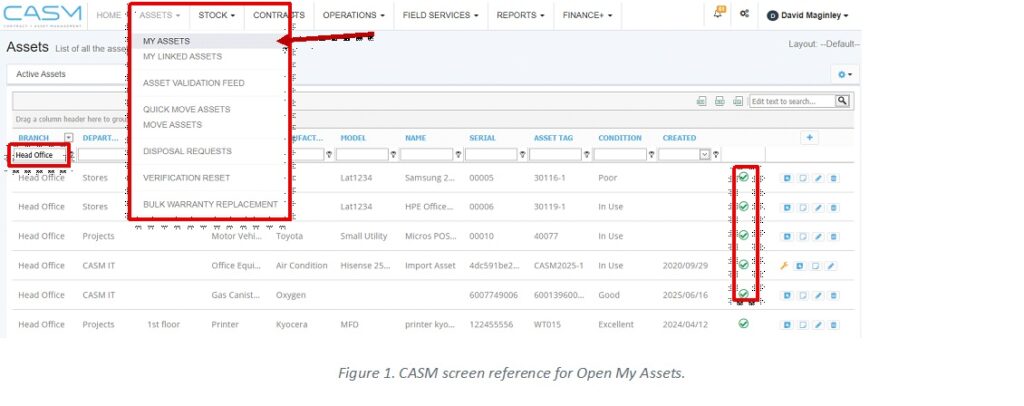
From the My Assets menu, select the Verification Reset menu option.
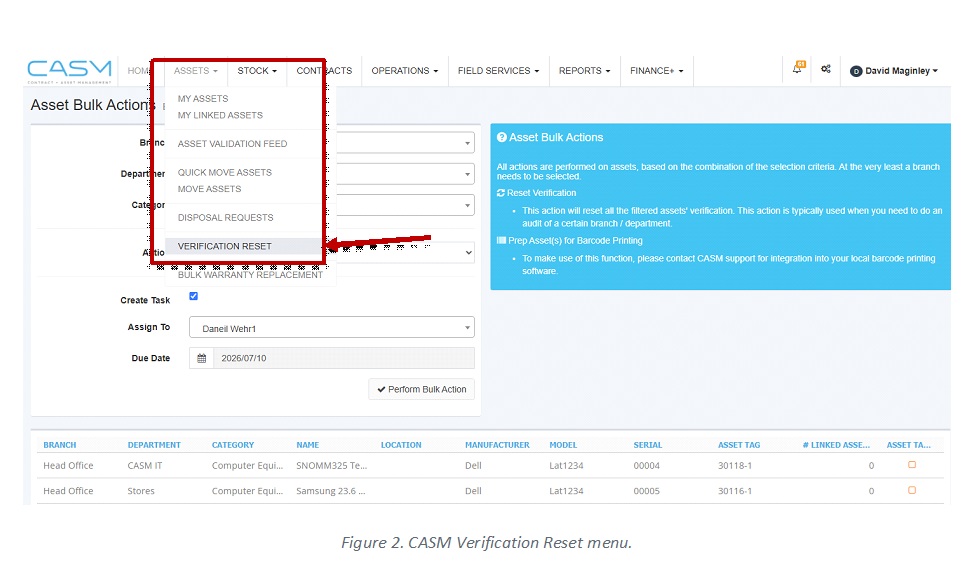
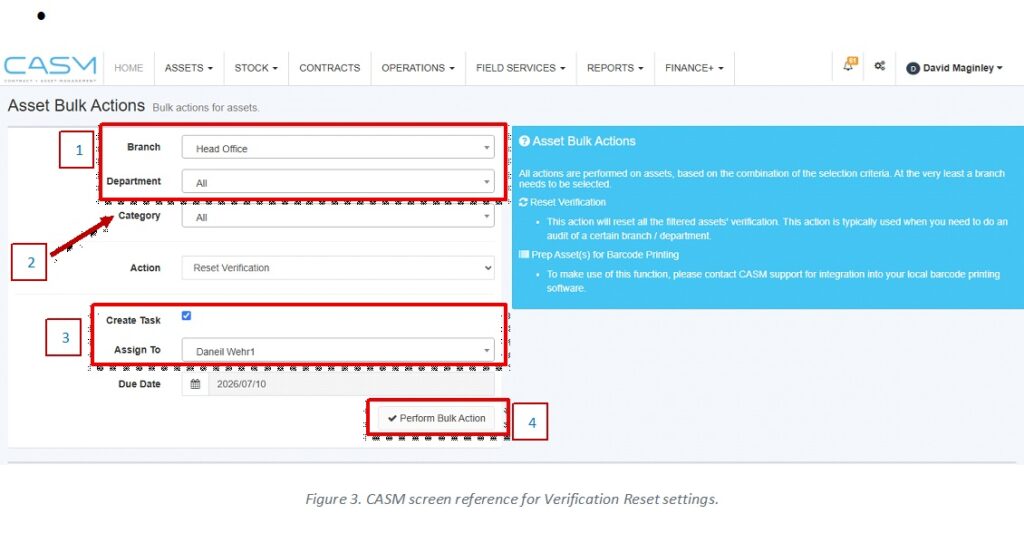
Figure 3. CASM screen reference for Verification Reset settings.
Return to My Assets and apply the same branch filter. Reset assets now show a red exclamation mark and must be verified.
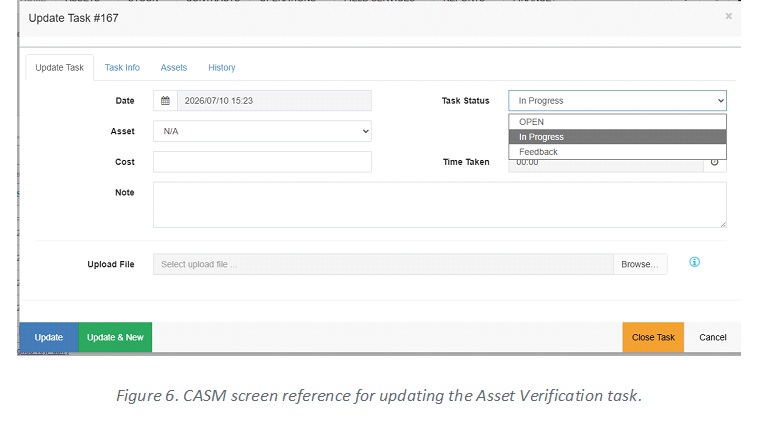
Open Tasks and locate the new asset verification task. Edit the task (1) and change its status (2) from Open to In Operations/In Progress. Update (3) saves the changes.

Edit the task if needed and mark it as in progress – this will inform the requestor that the task is taking place.
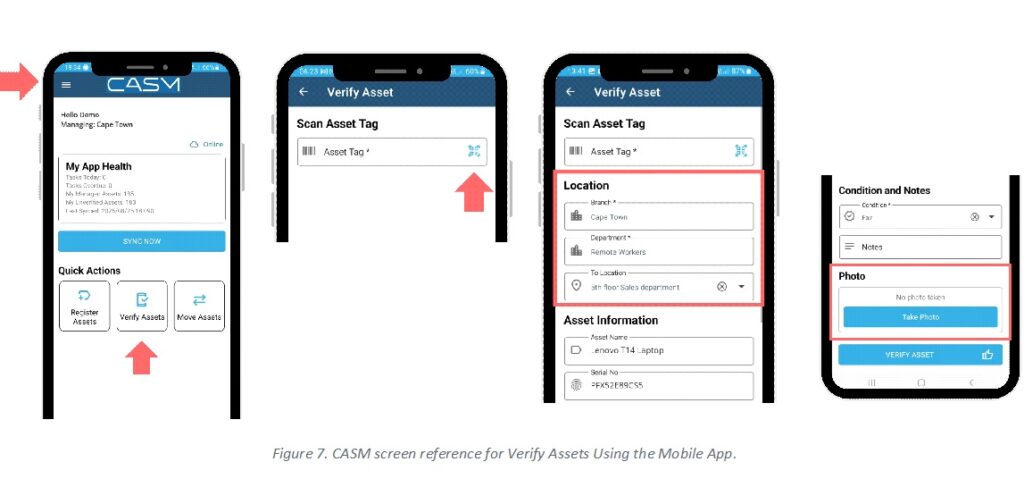
The assigned user walks through the selected area and scans each asset tag in the CASM mobile app. Verified assets return to a green tick status. Go to the verify asset on mobile help guide for more info.
Open Reports, select the Asset Status Report,

Filter to the branch, and use Checked or Unchecked to review verified and outstanding assets.

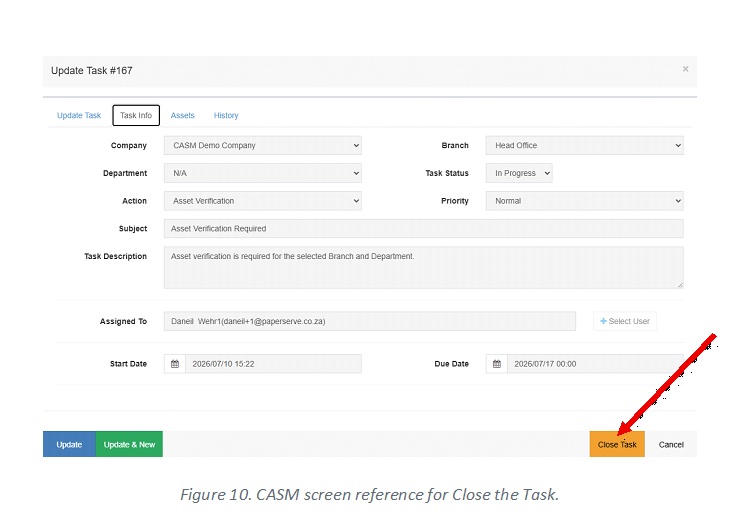
When all assets are verified, confirm that no red indicators remain, open the task, mark the audit complete and close the task.