
Centralised Contract Management with CASM
An effective contract management system is crucial for any organisation. CASM’s contract management features streamline the process, reduce risk, and improve overall efficiency. This section covers adding contracts and linking assets to them.
Understanding Contract Management in CASM
CASM’s contract management system offers several benefits:
Navigate to Contracts: Go to the main menu and select CONTRACTS.

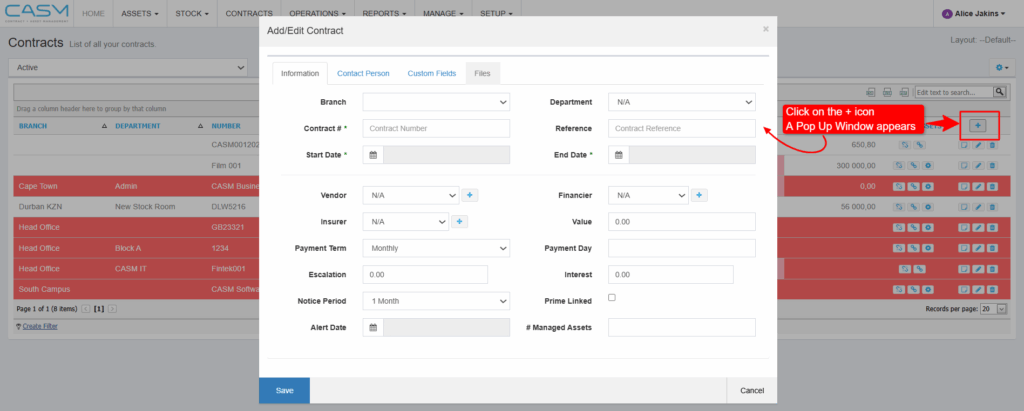
Click the Add Contract Button: Locate the clickable “+” icon in the top right corner of the contract grid. Clicking this will open a popup window to add a new contract.
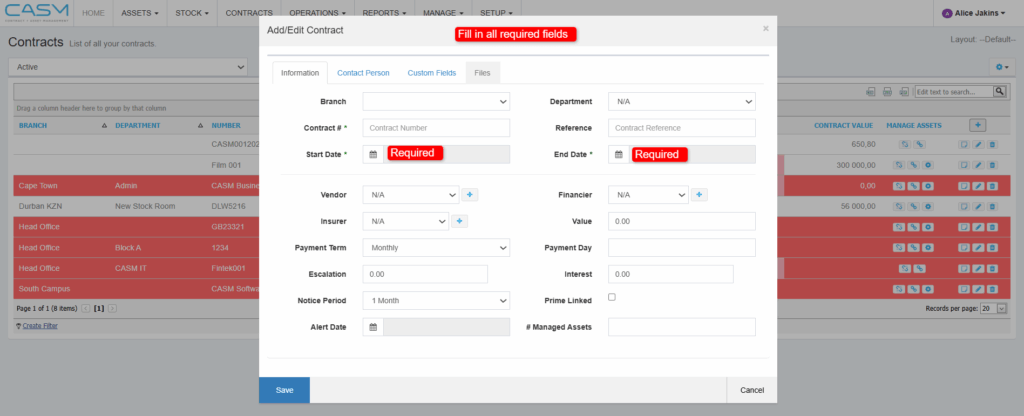
Fill in Required Fields: The popup window will display various fields. Be sure to complete all mandatory fields marked with an asterisk (*) to create the contract. These fields may include:
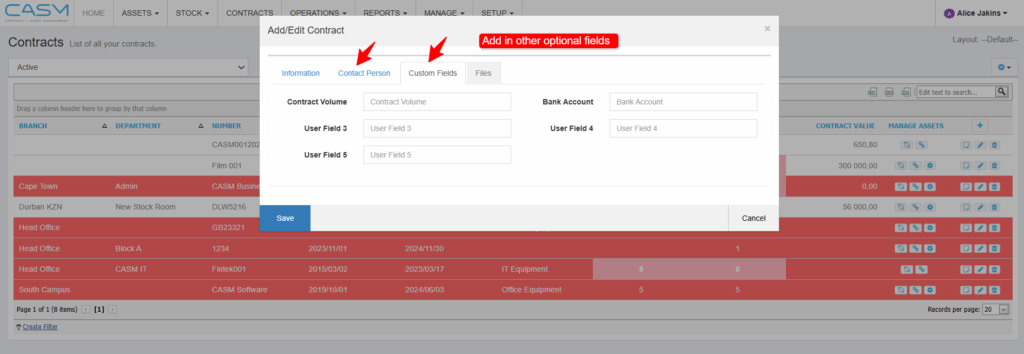
Add Additional Information (Optional): Use the available tabs within the popup window to include more details, such as contract value, terms, and attachments.
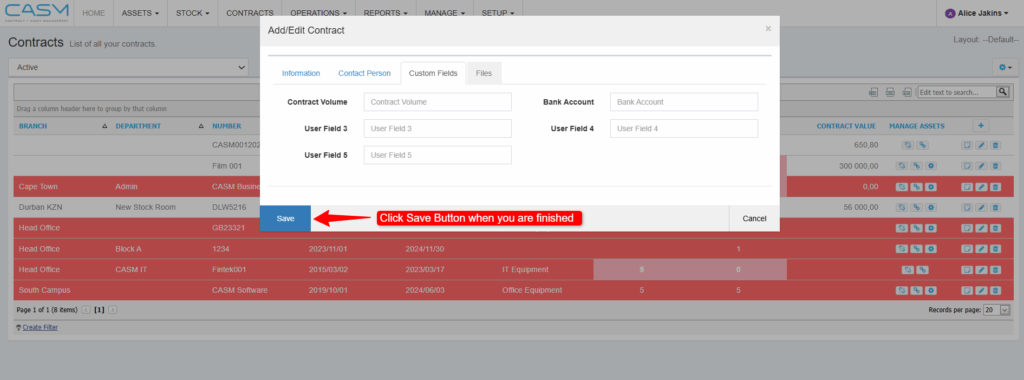
Save the New Contract: Once you’ve finished entering information, click the Save button to create the new contract.
Navigate to Contracts: Go to the main menu and select CONTRACTS.
Locate the Contract: Find the contract to which you want to link assets within the contracts grid.
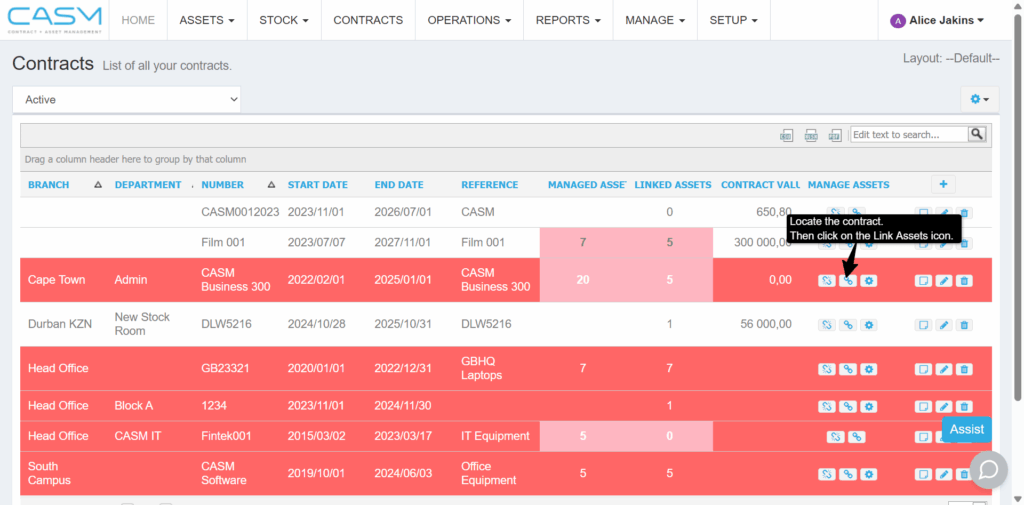
Link Contract Assets: Look for a section or button labelled “Link Assets” or similar wording within the contract details. Clicking this will open a window for selecting assets.
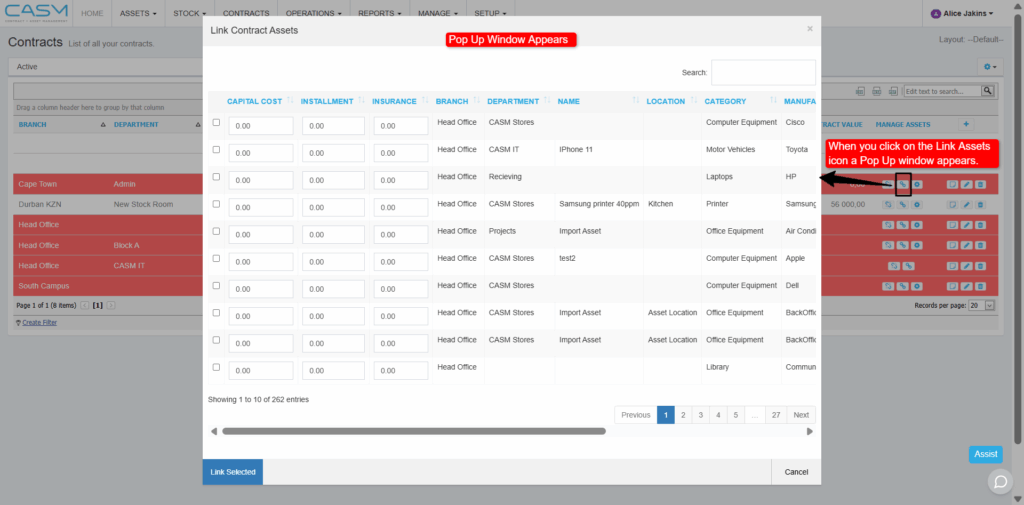
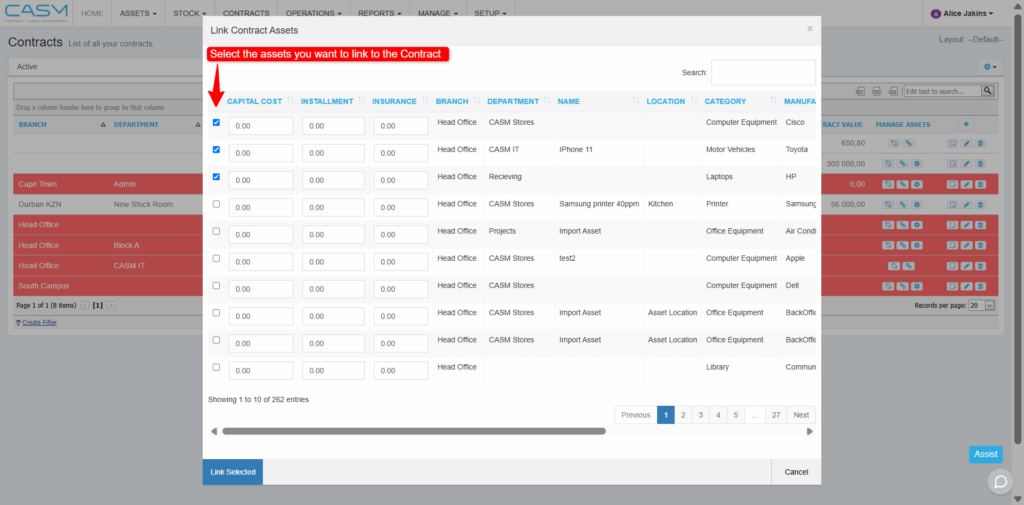
Select Assets to Link: In the asset selection window, locate the assets you want to link to the contract. Use the checkboxes next to each asset to select them.
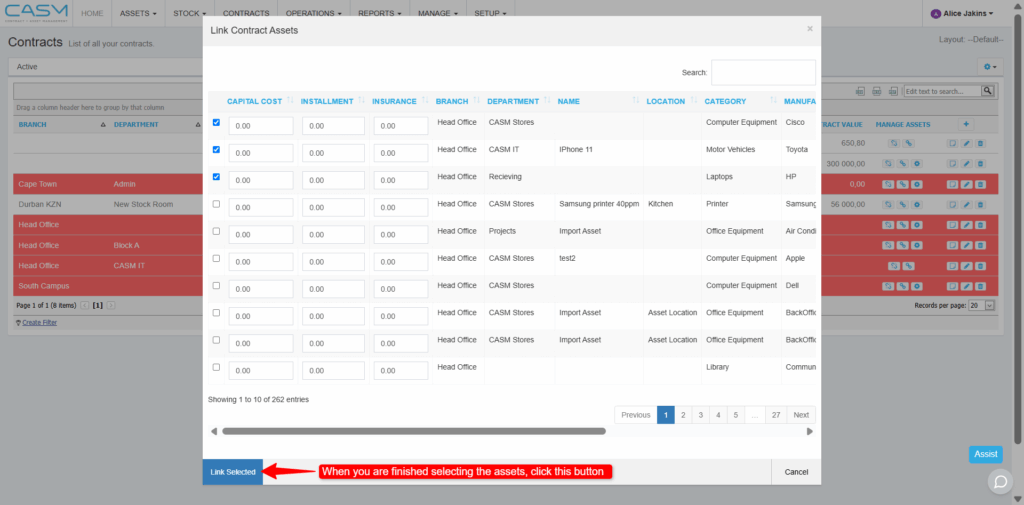
Link the Selected Assets: Once you’ve chosen the assets, click the Link Selected button to finalise the linking process.
Refer to the user guide for more details on managing existing contracts, including editing, searching, and viewing linked assets.
By effectively utilising CASM’s contract management features, you can streamline your contracting processes, improve organisation, and mitigate risks associated with your agreements.